This blog is for everyone who needs everyday how-to's on using the computer. Technology does not have to be complicated. Posts will include step-by-step instructions from how to set up your computer, to how to use common softwares such as Microsoft Office, and how to navigate websites. I hope you find this blog helpful.
Please send feedback, questions, and suggestions for future posts at any time.
Thank you for reading my blog.
Thursday, July 19, 2012
How to Group iPhone Icons
1. Go to the screen where the icons you want to group are located. If they are on different screens, then go to the screen where one of the icons are located. (See below on grouping icons that are in different screens.)
2. Hold down any icon on the screen until all the icons start to “wiggle”.
3. Hold down and drag one of the icons you want to group to be on top of the other icon that is to be grouped with.
4. Release the icon. You will be prompted to name the new group. Enter new group name or you may choose to use the default name assigned.
5. Touch outside the main area when done. You will see your new group on the screen.
6. To add icon from different screen to the group, go the screen where the icon you want to move is located.
7. Hold down the icon until the icons begin to wiggle as in step 2 above.
8. Drag the icon either to the left or right of the screen depending on which screen the group is located.
9. The screen will change “pages”. Continue to hold on to the icon and drag to the designated group and release.
10. Your icon has been added to the group.
Tuesday, July 17, 2012
How to Use Microsoft Office Templates
1. Start a new work book by clicking on the Office icon at the top right-hand corner.
2. Select “New” from the drop down menu.
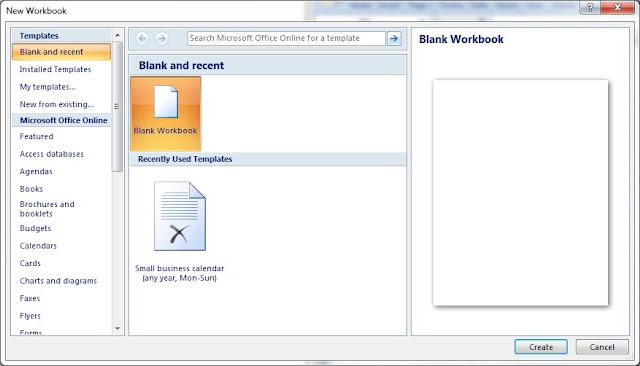
You will see a “New Workbook” screen pop-up from the window.
2. Select “New” from the drop down menu.
You will see a “New Workbook” screen pop-up from the window.
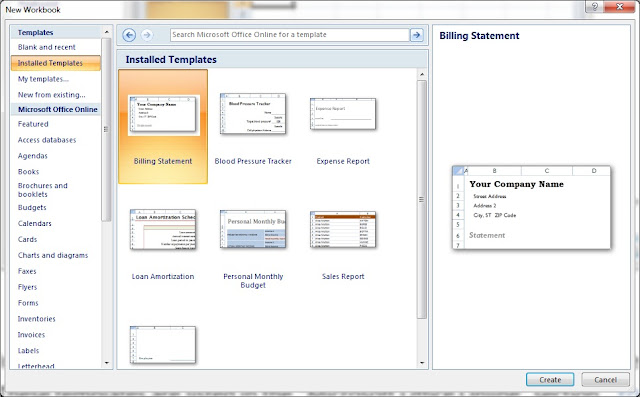
3. In the “New Workbook” screen you will see a list of templates are available. In the “Templates” section, under “Installed Templates” are listed templates that are already on your computer. You do not need to be connected to the internet to use these templates.
4. There are also additional templates listed in the “Microsoft Office Online” section available for download. You will need to be connected to the internet to use templates from this section. Some of these templates were created by Microsoft and some were created by Microsoft Excel users to share with others.
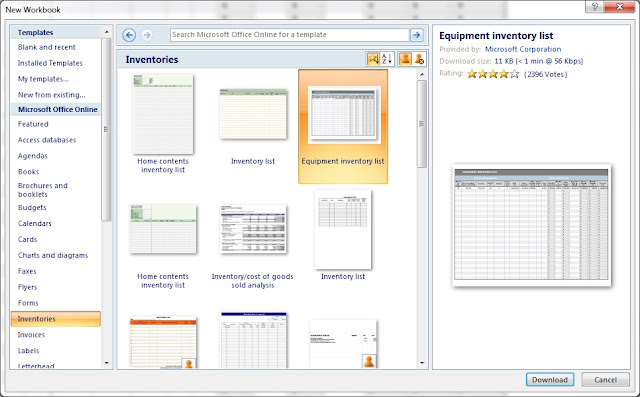
5. To determine the source of the template, select a template by first selecting a category and then click only once on a template icon. For example, select “Inventories” category, and then click once on “Home contents inventory list”. You will see the screen below.
Figure 3. Microsoft Office Online templates
On the rightmost column of the “New Workbook” window, you will see the title of the template. In the figure above, the title is “Home contents inventory list”. The “Provided by” specifies who created the template. The “Download size” indicates how large the file is. Most template file sizes are relatively small (less than 100KB) so you do not need to worry about download time. The “Rating” is based on user feedback of the template. A preview image of the template is also shown in this section.
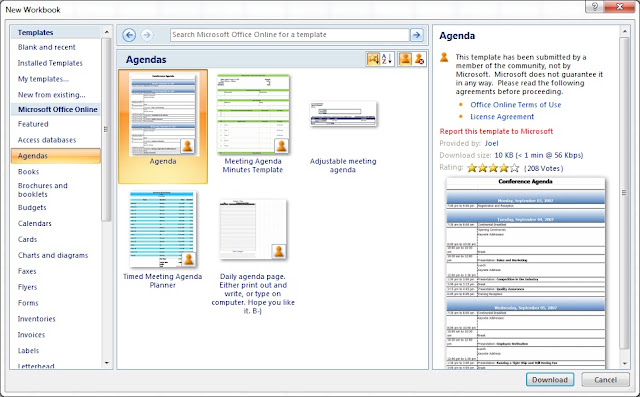
6. A template that was submitted by a User and not created by Microsoft will have a disclaimer from Microsoft in the rightmost column. See example below.
Figure 4. Member submitted template
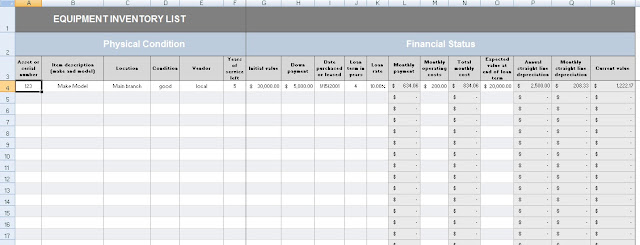
The downloaded template will populate and your document. You can begin using the template and remove
any sample information that may be on the template.
Thank you for using this post. Please send feedback, questions, recommendations through the comments.
ZeekZackZoom
Welcome to ZeekZackZoom
Welcome!
This blog is for everyone who needs everyday how-to's on using the computer. Technology does not have to be complicated. Posts will provide step-by-step instructions from how to set up your computer to how to use Microsoft Office and how to navigate websites. I hope you find this blog helpful.
Please send feedback, questions, and suggestions for future posts at any time.
ZeekZackZoom
Subscribe to:
Comments (Atom)


